Products
Solutions
Resources
9977 N 90th Street, Suite 250 Scottsdale, AZ 85258 | 1-800-637-7496
© 2024 InEight, Inc. All Rights Reserved | Privacy Statement | Terms of Service | Cookie Policy | Do not sell/share my information

When a project is integrated with DocuSign, you can send a document to DocuSign for an eSignature.
DocuSign tags can be embedded in the contract template. The DocuSign tags correspond to DocuSign recipients configured in the project settings, project contacts, and user information defined in the Division of responsibility section of the contract details.
After a document has been created, you can send it for official eSignatures via DocuSign.
Documents must be in Word, Excel, or PDF format. They must be saved to the contract or VCO supporting documents page with the document source My computer. You must have Edit contract permissions to send documents. Ensure that your browser's pop-up blocker is disabled before you click Send from the Contract DocuSign wizard. You must have the permission Send for eSignature to send a document for signature.
From the contract or VCO Supporting documents page, select one or more documents with the document source My computer, and then click the Send for signature icon.

The Send for signature wizard opens.
Review the Names in the Assigned section of the wizard. If you want to add additional recipients, find their names in the Unassigned section, and then click the Add icon. All signees in the Assigned section have ad-hoc signee tags that can be placed on the document in DocuSign.
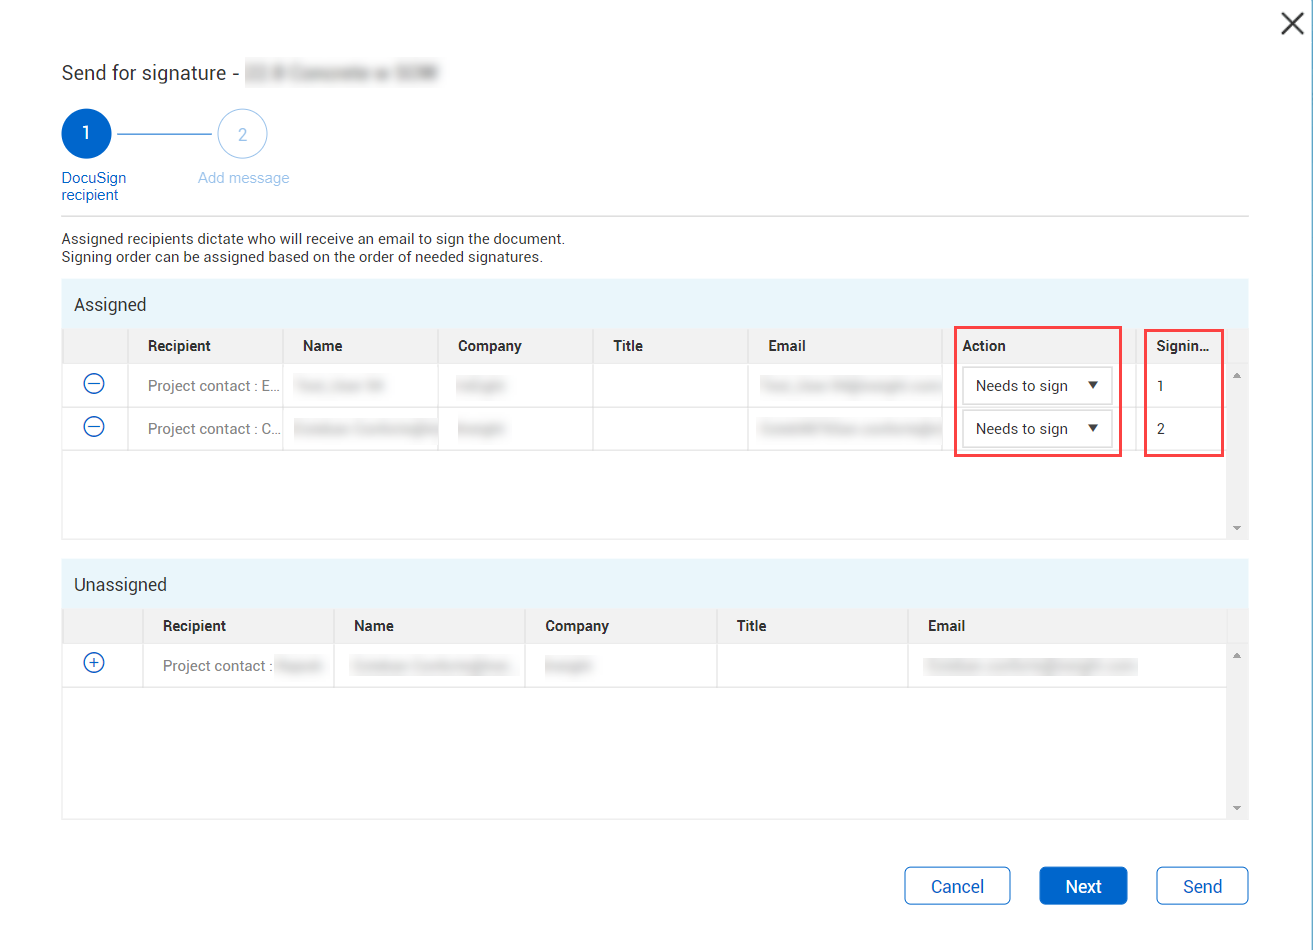
For each assigned recipient, specify in the Action column whether they need to sign the document or if they are just to receive a copy.
When the value is Needs to sign, the recipient receives a document that is ready to sign.
When the action is Receives a copy, the recipient receives a snapshot of the document in the signing order. For example, if the recipient marked Receives a copy is second in the signing order, they receive the document after those first in signing order, even though they are not signing.
Review the values in the Signing order column. The numbers in the column specify the order in which the recipients are sent the document for eSignature. You can assign a single number to multiple signees. The signee or signees with signing order 1 are notified first by DocuSign. After all signees in signing order 1 have signed, DocuSign notifies all signees with signing order 2, and so on.
If recipient information is missing from the Assigned section, update the information as needed. Any updates you make are saved in the DocuSign section on the header tab of the contract.
Click Next. The Add message page opens.
Enter an email subject line and message to the recipients, and then click Send. A DocuSign window opens with the documents you chose.
If the DocuSign window does not open, ensure that your browser's pop-up blocker is disabled.
If your DocuSign administrator has configured Advanced Options, you can expand the Actions menu, and then select Advanced Options.
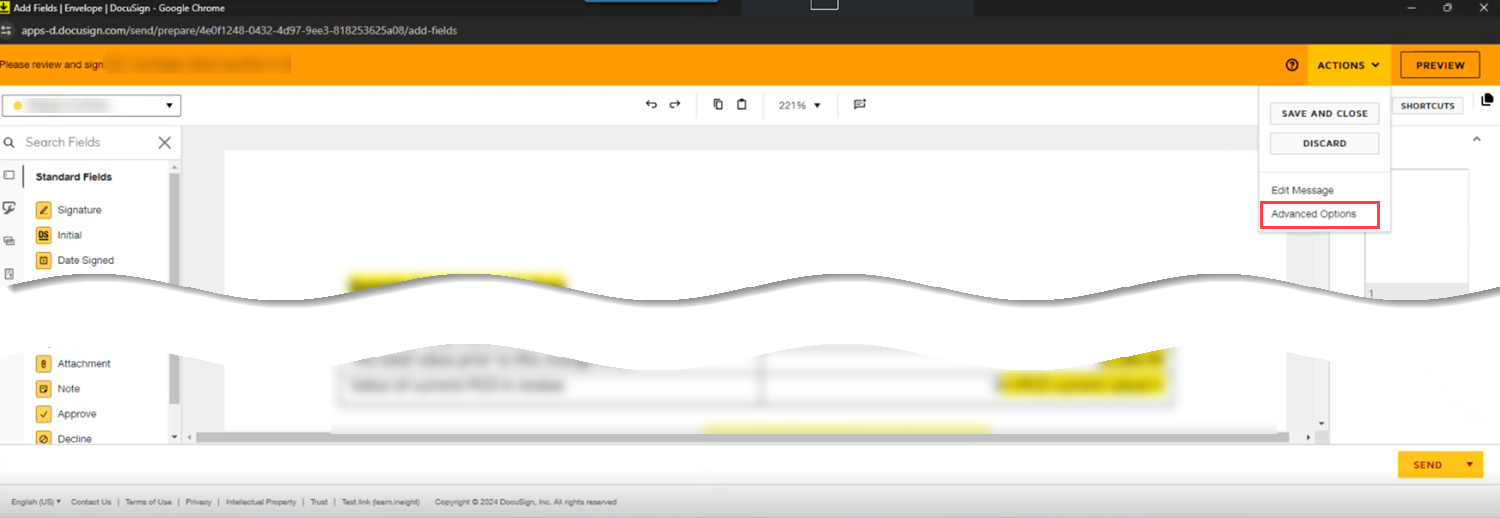
You can then customize the following options:
Branding – Select a logo and brand colors, set up by the DocuSign administrator, for the envelope.
Recipient privileges – Give recipients options for how they sign the document, such as signing on paper, assigning delegates, and editing documents.
Reminders – Specify whether DocuSign sends reminders to signees, when to start sending them, and how often to send them.
Expiration – Set the number of days until the envelope expires and how often to send alerts.
Comments – allow senders and recipients to enter comments on documents in the envelope.
Click Save. You are returned to the document.
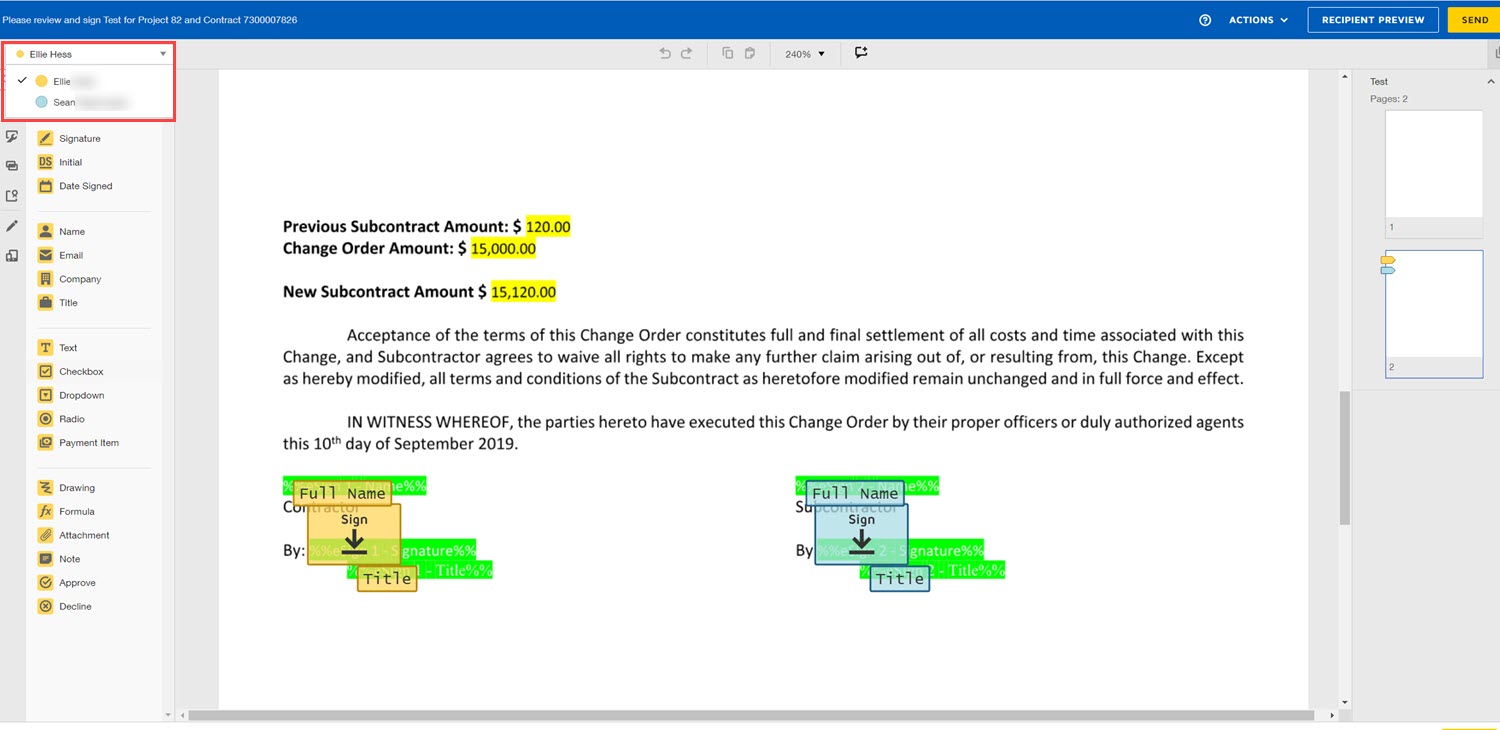
Optionally, add additional tags for signatures, initials, and dates. All names from the Assigned section of the wizard are shown in a drop-down list in the upper left pane. Select the name of the person you want to add, and then select Signature, Initial, or Date Signed, and then click the place in the document. If the document has tags for a text box, drop-down list, check box, or radio buttons, add the values to the document.
Click Send.
The documents are routed for signature, and DocuSign sends an email message to each recipient based on the signing order. In Contract, the DocuSign status column on the Supporting documents page is populated with the status of Sent. You can hover over the status to see the name of the person who sent the document and the status of the signatures. The Contract writer automatically adds the sender to the last position of the list with the action Receives a copy. After it is completed, the signed document is loaded as a supporting document with a document type Signed document. The person who sends the document to DocuSign receives an email notification when the document signatures have been completed and also receives a copy.
When a supporting document has a DocuSign status of Created, Sent, Completed, or Signed, you can no longer edit the file link.
Additional Information
9977 N 90th Street, Suite 250 Scottsdale, AZ 85258 | 1-800-637-7496
© 2024 InEight, Inc. All Rights Reserved | Privacy Statement | Terms of Service | Cookie Policy | Do not sell/share my information